|
 |
 |
 |
 |
 |
 |
|
Binding Your Project
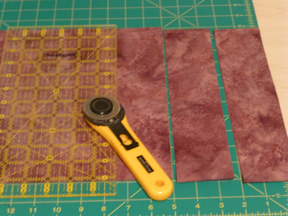
Cut your binding strips selvage to selvage (these are cut 2 1/2" wide). |
Mitering your strips will help distribute the bulk from the seam. |
Press seams open to distribute the bulk from the seams. This is particularly helpful when a seam falls in a corner. |
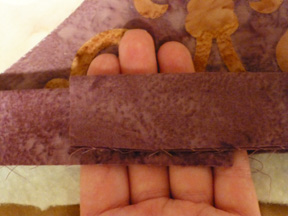
Fold the entire length of your binding strips in half and press. |
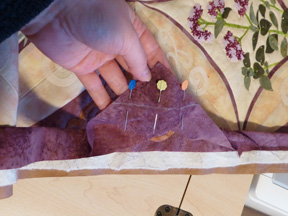
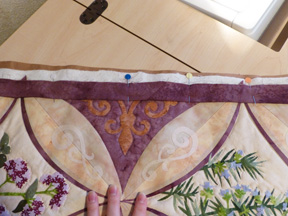
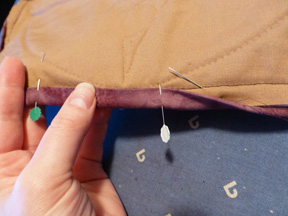
Begin sewing your binding strips to your quilted project. Leave a tail of about 8" to 12" at the beginning. On a flat surface, pin the binding about every 3" to 5". |
Place the last pin a 1/4" from the edge of your quilt top. |
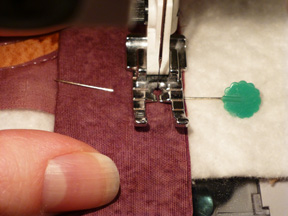
Using a 1/4" foot, stitch up to the last pin, and secure your stitches with a lock (tack) stitch. |
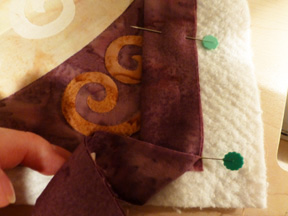
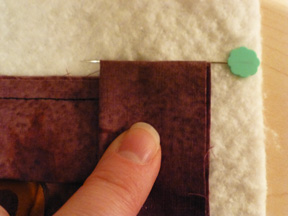
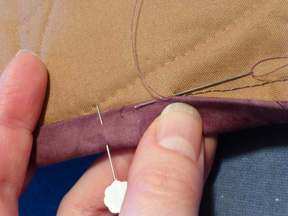
Fold your binding as shown above, to the seam line. |
Fold the binding over a second time, and place a pin to mark the top of the binding strip. This line will vary depending on the width of your strips. |
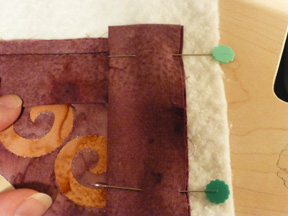
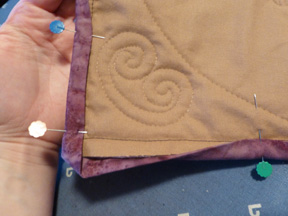
Fold your binding strip up, and aligned with the edge of the next side (see above). |
Fold the strip down, and line up the top of the fold with your pin. |
Pin your binding strip. |
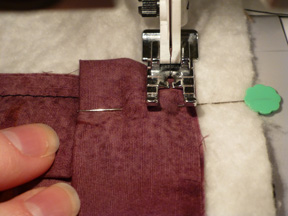
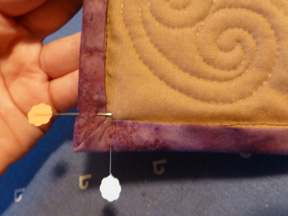
Using a 1/4" foot, stitch up to the last pin, and secure your stitches with a lock (tack) stitch. Repeat for all sides and corners. |
On the last side, leave a gap of about 16" to 24" unsewn. Lay the loose pieces flat along the quilt top, overlapping. Cut the binding strips so they overlap by the width of the strips (in the case above by 2 1/2"). |
View of the overlap. |
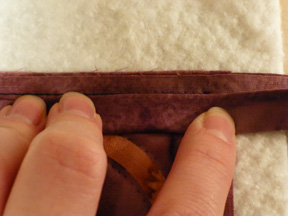
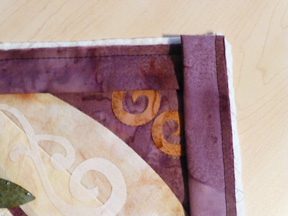
Miter the ends together. Before trimming, make sure you haven't accidentally twisted your binding strips. |
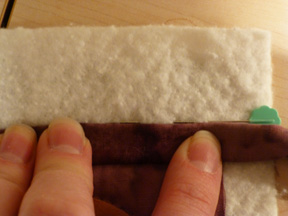
Lay binding flat and pin. Stitch to close. |
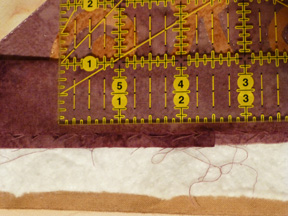
Trim excess backing and batting the same distance from the edge of the quilt top as the corner overhang (see above). Trim corners at an angle to eliminate excess bulk. |
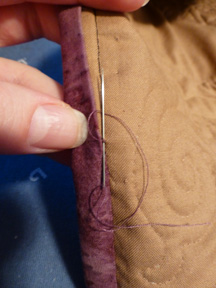
To finish the binding. Wrap the binding around to the back of the quilt and pin, covering the binding seam. I usually only pin around 12" to 15" at a time so I don't have a lot of extra pins poking me as I work. |
Stitch through the backing material about an 1/8" to 1/4" at a time, coming up and just catching the binding on the folded edge. |
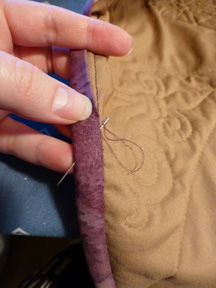
When you come to a corner, pin one side down (as shown above). |
Fold the other side over to make a mitered corner and pin well. Repeat for all four corner. |
When your thread gets short, knot your thread two to three times to secure your stitching well. |
Run the needle out through the binding and cut to hide the loose thread. |
This process will make a nice full and even binding. |
|
Updated by Dana Michelle
03-Jan-2026